Setting Up A Web And Email Server On Debian Linux
There are a two items that we will need in order to accomplish this:
- A domain name
- A server to host the website
Part 1 - The Domain
You are going to need to get yourself a domain name such as "example.com" so that people don't have to memorize an IP address to get to your server. You can purchase a domain through a registar such as GoDaddy, Namecheap, or Epik. I like Epik because they are cheap and give you free WHOIS privacy for all domains. Create an account at whatever registar site you want, pick a domain, and then purchase it.
Part 2 - The Server
You need some sort of hardware to actually put the website on. This can be a virtual instance from a cloud hosting provider such as Vultr. I recommend to use Vultr because it is very easy to get port 25 unblocked for your server which you need unblocked for your email server. Go ahead and create an account at Vultr.com and deploy a new instance (server). Depending on the region you choose to deploy your instance in, you may have different price options. If you go with the New York (NJ) region then you will be able to select a server for $3.50/mo. Otherwise, the next cheapest is the $5.00/mo server. Don't purchase the $2.50/mo server because we need IPV4 and that one only gives you a IPV6 address. You really don't need anymore than 1 vCore and 512MB of RAM for a web and email server unless you expect to get tons of traffic to your website or you have a lot of email users.
**You also have to the option to host on a computer at your home, however this comes with some extra configuring to do since residential ISPs only give out dynamic IP addresses. I would recommend purchasing some sort of VPS from a cloud provider since you get a static IP address and it makes the process MUCH simpler.
For this guide, I am going to install Debian 10 on the server. You could also use Ubuntu 20.04 or similar. I wouldn't recommend using a different distro than those two for reasons you will find out later.
Under "Additional Features" go ahead and select "Enable IPv6". Don't bother with the other features.
Under "Server Hostname & Label" type in "yourdomain.com". Of course, fill in the "yourdomain.com" part with the domain that you purchased.
Click "Deploy Now"
Under "Instances" you should now see a server that is labeled with your domain. You should also see an IPv4 address on it as well. Take note of this address because we will need it in a second.
Click on the instance and it will bring you to another page called "Overview". This page also has the IPv4 address on it but it also has the password for the root account of the server which we will also need later when we SSH into the server.
While you are there, click the tab that says "Settings". This will bring you to a page and you can see that "IPv4" is selected in the menu to the left. You should also see some labels on the page that say something like:
Address Netmask Gateway Reverse DNS
Under the "Reverse DNS", edit it to say "mail.yourdomain.com" and replace "yourdomain.com" with the one you purchased.
Take a look at the left side menu again and click the "IPv6" tab. This is where you can find the IPv6 address of the server. Go down to where it says "Reverse DNS" and add an entry and copy & paste the IPv6 address of the server into the IP box and type in "yourdomain.com" in the Reverse DNS box then click the "Add" button.
Part 3 - Setting up DNS
This is the part where we connect your domain to your actual server that you just spun up. When people type in your domain, we want them to be pointed to your server which is exactly what we are going to do here.
You need to log into the account of whatever registar you chose earlier if you aren't already. When you are logged in, find where you enter the DNS records for your domain on the registars website. If you can't find it then google it.
Once you have found where to enter the DNS records, we are going to have to enter a few A (IPv4) and AAAA (IPv6) records as well as some MX (email) records.
A Records (IPv4)
- Add a new record with the A type, put the host as "@", and the value should be the
- Add a new record with the A type, put the host as "*", and the value should be the
- Add a new record with the A type, put the host as "www", and the value should be the
AAAA Records (IPv6)
- Add a new record with the AAAA type, put the host as "@", and the value should be the
- Add a new record with the AAAA type, put the host as "*", and the value should be the
- Add a new record with the AAAA type, put the host as "www", and the value should be the
MX Records (email)
- Add a new record with the MX type, put the host as "@", set the priority as 10, and the value should be "mail.yourdomain.com" replacing the "yourdomain.com" with the one you purchased.
Part 4 - Getting Into the Server
Now that we got the initial setup all done, we can finally move on to doing some work on the actual server. We are going to be administering the server through SSH and I highly recommend that you go through the process of securing your SSH server. For the sake of simplicity, in this guide we are just going to be SSHing into the server using the root credentials which you really shouldn't do.
For these next steps we are going to be using the CLI (command line interface).
If you configured your DNS records correctly, you should be able to access the server using the domain name so go ahead and issue an SSH command to get into the server as root:
# ssh root@yourdomain.com
Remember, the root password is on the Vultr website under the server settings so copy and paste that password when it prompts you.
Once you are in, you are going to want to update the server:
# apt update && apt upgrade
Part 5 - Configuring Nginx Webserver
We are going to use Nginx to power our webserver and we are going to use Certbot to encrypt our domain with SSL/TLS which will allow us to use HTTPS instead of HTTP. We can install those with this command:
# apt install nginx python-certbot-nginx
Once those packages are installed on your system we can start to configure Nginx.
Typically on a Debian system, the main configuration directory is going to be /etc/nginx. Inside of that directory there will be 2 other important directories called sites-available and sites-enabled.
sites-available - This directory contains configuration files for each site you are hosting. By default there is a file called default in there initially.
sites-enabled - This directory contains ONLY symlinks to the files that are in sites-available. Basically, you have to symlink the file to this directory to tell Nginx to make the site "active" and accessible to people.
Lets start by making a copy of the default file in sites-available to a new file. You can name this file whatever you want but I would just name it the name of your domain without the TLD part. (Ex. "yourdomain" of "yourdomain.com"). We can do that with the cp command:
# cp /etc/nginx/sites-available/default /etc/nginx/sites-available/$YOURFILENAME
Use your favorite text editor and edit the new file that you created. If you ignore all of the commented lines in the file, you should see something like this:
server {
          listen 80 default_server;
          listen [::]:80 default_server;

    root /var/www/html;

    index index.html index.htm index.nginx-debian.html;

    server_name _;

    location / {
      try_files $uri $uri/ =404;
    }

    }
Get rid of the "default_server" in the "listen" lines. The "root" line tells Nginx where to look for the website html/css files to serve for the particular site. This can be whatever you want. Lastly, the "server_name" line tells Nginx what domains to use this configuration file for. Remove the last underscore in that line and replace it with "yourdomain.com" and "www.yourdomain.com".
After you edit the file, it should look something like this:
server {
        listen 80 ;
        listen [::]:80 ;

        root /var/www/$DIRECTORYNAME;

        index index.html index.htm index.nginx-debian.html;

        server_name yourdomain.com www.yourdomain.com;

        location / {
            try_files $uri $uri/ =404;
          }

    }
Were done editing that file so save and exit. The next thing we need to do is symlink the file to the sites-enabled directory. Use this command:
# ln -s /etc/nginx/sites-available/$YOURFILENAME /etc/nginx/sites-enabled/$YOURFILENAME
Also, you have to make the directory that you pointed the root to if it doesn't already exist:
# mkdir /var/www/$DIRECTORYNAME
This is the directory that you will upload your html/css files to on the server. So when people go to "yourdomain.com" or "www.yourdomain.com" in their web-browser, Nginx will look for files in this directory and server whatever is in there to the web-browser.
We also need to create a configuration file for our mail subdomain for our email purposes. Were basically going to do what we did above except slightly different. Go ahead and make a another copy of the "default" file and call it "mail":
# cp /etc/nginx/sites-available/default /etc/nginx/sites-available/mail
Then use your favorite text editor again and edit the file so that it looks like this (ignoring commented lines):
server {
        listen 80 ;
        listen [::]:80 ;

        root /var/www/mail;

        index index.html index.htm index.nginx-debian.html;

        server_name mail.yourdomain.com www.mail.yourdomain.com;

        location / {
            try_files $uri $uri/ =404;
          }

    }
Symlink that file into the /etc/nginx/sites-enabled directory:
# ln -s /etc/nginx/sites-available/mail /etc/nginx/sites-enabled/mail
Finally, we have to reload the Nginx program:
# systemctl reload nginx
So now, inside of your /etc/nginx/sites-available/ directory you should have 3 files: default, $YOURFILENAME, and mail. There should also be 3 symlinks for these files in the /etc/nginx/sites-enabled directory. That's pretty much it for configuring Nginx.
Getting Certificates with Certbot
In order to encrypt our sites with HTTPS and have SMTPS and IMAP secure for our email server, we need to get some SSL certificates. We can get these for free through the non-profit organization Let's Encrypt. We can accomplish this with the Certbot tool:
# certbot --nginx
It will ask you for your email and to agree to the TOS. It will then ask you what domains you want to activate HTTPS for. You should see a numbered list with your domains yourdomain.com, mail.yourdomain.com, www.mail.yourdomain.com, and www.yourdomain.com. We want to select all of them. If that was successful, it will finally ask you if you want to redirect the sites you chose. We want to say yes so select option 2 Redirect.
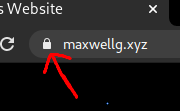
Congratulation, you now have your own website that is secured with certificates and supports HTTPS! If you go to your site you should see a lock next to the website name in your browser like this:
Part 6 - Configuring E-mail Server Software
Normally setting up an email server is difficult and tedious. Fortunately, there is a custom script we can use to do everything for us. I can't take any credit for this script because it was written by Luke Smith. You can check him out on YouTube here and his website is here. This is simply just a BASH script so you can open the file up in a text editor and read it to see what it does if you are paranoid and you don't trust it. Anyway, it's good practice not to run random scripts you find on the internet. You can view the Github page for the script here to get more information on what it does and does not do.
You can get it from Github (this will put it in a folder called "emailwiz"):
# git clone https://github.com/LukeSmithxyz/emailwiz
Make sure you are in the same directory as the script and start it:
# sh emailwiz.sh
It will start out by installing all of the necessary software. Specifically it will download Postfix, Dovecot, Spamassassin, and OpenDKIM. When it asks for "System mail name:" enter in your domain as "yourdomain.com". The script will then continue downloading all the stuff so sit back and relax until its done.
At the end of the script you will see some instructions about adding three additional records to our DNS setup. These are TXT records that were generated by the script and it's important that we add these to our DNS records on the registars website.
Go back to your registars website and add a record with the TXT type. In the script generated text, you will see something like this:
mail._domainkey TXT v=DKIM1; k=rsa; p=...
The "mail._domainkey" is the host part of the record so copy and paste that into the host box of the record. The "TXT" is obviously the type of record. Finally, the "v=DKIM1; k=rsa; p=..." is the value part of the record so copy and paste this into the value box of the record (there should be a long string of numbers and characters in the "p=" part.)
Complete this process for the other two TXT records:
_dmarc TXT v=DMARC1; p=none; rua=...; fo=1;
@ TXT v=spf1; mx a:mail.yourdomain.com -all
Adding a User Mail Account
At this point, you should have a functioning email server if you did everything right but, we still need to add an account for our email server. If we create a user on the server and add them to the "mail" group then, they will have a mail account that can send and receive. Let's do that:
# useradd -G mail -m &USERNAME
Give the user a password:
# passwd &USERNAME
This is the username and password that you will use to log in on your mail client (such as thunderbird). Ex. if you created a user name "dave" with a password of "12345" then, his login would be dave@yourdomain.com and the password would be "12345".
Mail Client Settings
For the
Protocol: IMAP
Server: mail.yourdomain.com
Port: 993
SSL: SSL/TLS
For the
Protocol: SMTP
Server: mail.yourdomain.com
Port: 587
SSL: STARTTLS